Indiana University Network Science Institute
Enso
Documentation Pages
Creating and Managing Rosters
Table of Contents
View the Project on GitHub bs22iu/Enso_docstest
Creating and Managing Rosters
-
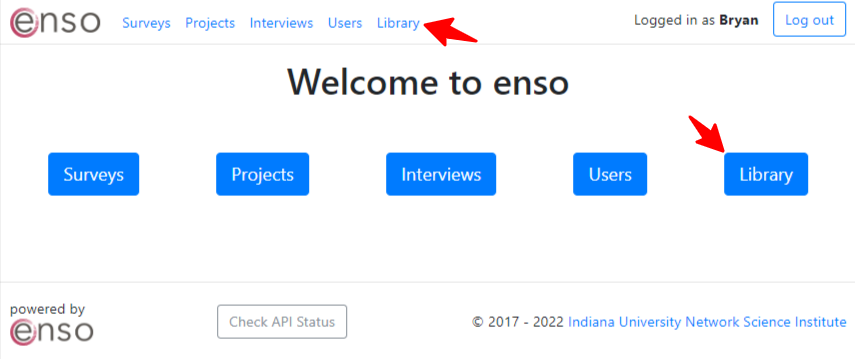
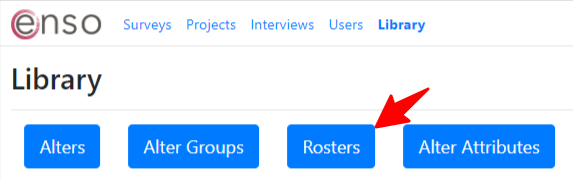
First, click on the “Library” link in the top menu or the blue “Library” button located in the middle on the home Enso landing page.
- Then click on the blue “Rosters” button located on the Library page
-
This will take you to the Rosters page, where you can find and view all the Rosters you have created.
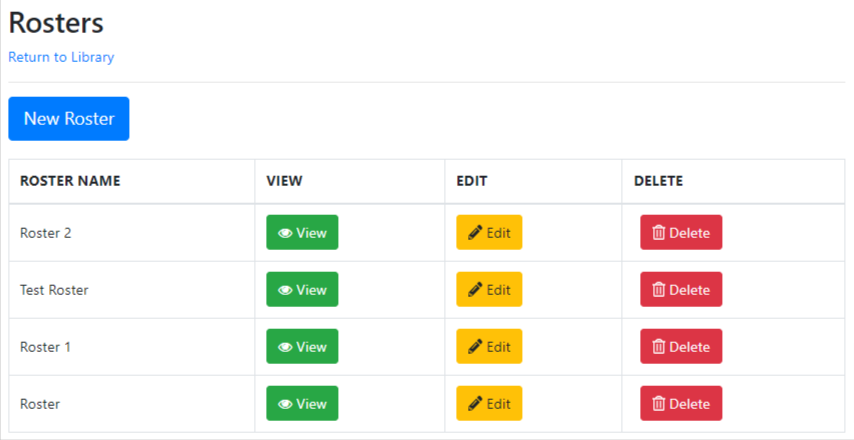
Create New Roster
- Click on the “New Roster” button.
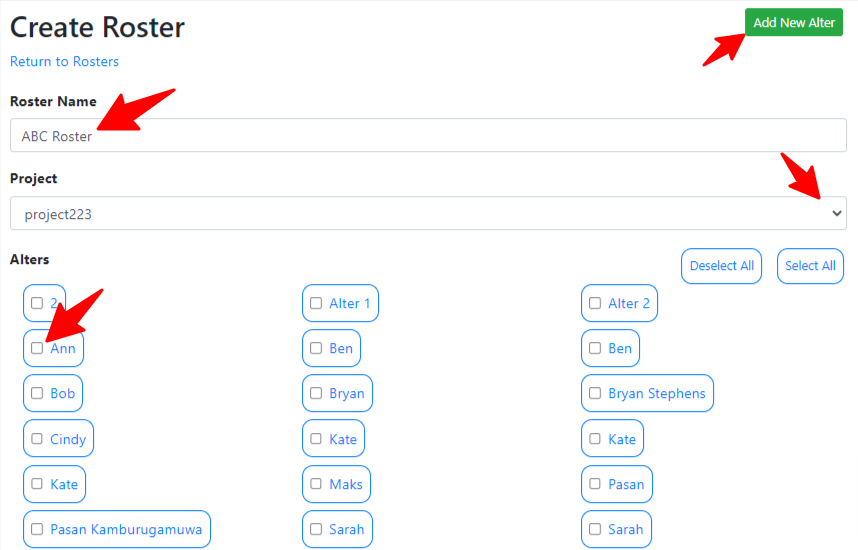
- Type in a name for you new roster in the “Roster Name” field
- Add Alters from existing Projects
- Assign the new roster to a project by clicking the pulldown “Project” menu, which lists all the projects you have created.
-
We recommend creating a project before creating a Roster
Add New Alters
- After clicking the green “Add New Alter” button (shown above), complete the 3 fields on the Create Alter page.
- Alter Name: type in the name of the individual that will be added to the roster
- Email address: type the individual’s email address. This is important if you plan to use Enso to distribute your survey via email.
-
Project: Select the project name from the pulldown (again, it is beneficial to create a project before you start building a roster)
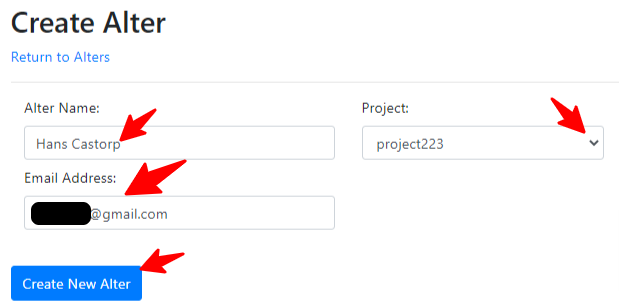
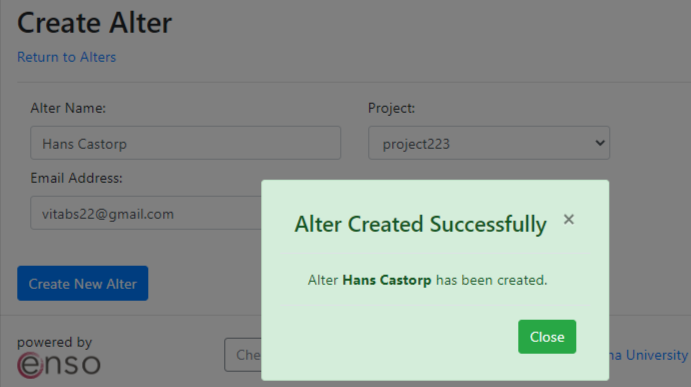
- After completing the fields above, click the blue button “Create New Alter” to finalize the creation.
- Upon clicking, you will see a green confirmation box showing “Alter Created Successfully” (see image below).
- Press the “Close” button and you will be redirected to the Alters page for the Project you assigned for the newly created author.
-
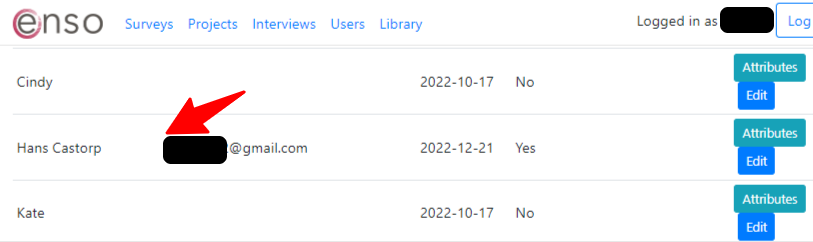
To add additional Alter to the same project, simply click the blue “New Alter” button at the top of the Alters page and repeat the steps above.
-
- Assign newly created alters to Roster
- After you create a new alter, they are assigned to a project but they are still not added to a Roster. If you wish to add the new alter to a Roster, you must follow the steps from the section “Add Alters from existing Projects”
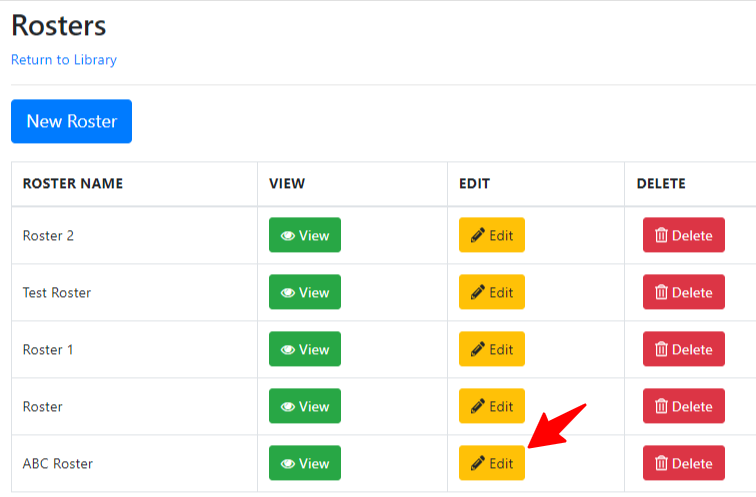
- Navigate to the Rosters page
- Click the “Return to Library” link (or the “Library” link in the top menu) » then click the blue “Rosters” button
-
Find the Roster where you want to want to add the new alter you just created and then press the yellow “Edit” button.
-
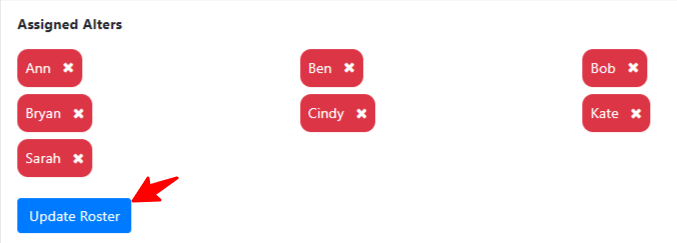
In the “Alters” section, find the new alter you just created and click the checkbox next to their name.
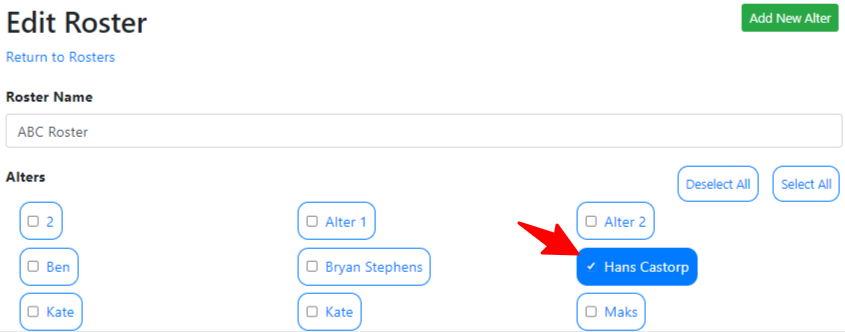
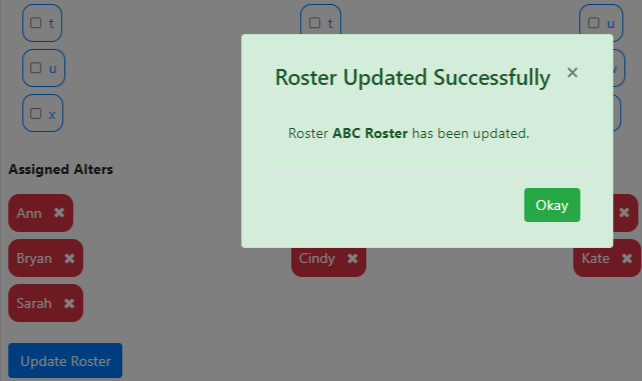
- Finally, click the blue “Update Roster” button at the bottom of the page.
- You should see a confirmation box stating “Roster Updated Successfully”
-
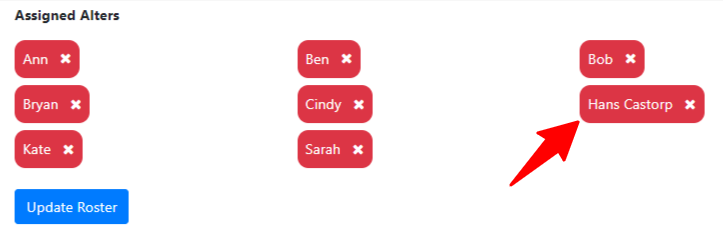
You also should be able to find the added alter in the “Assigned Alters” section towards the bottom of the page (see below).
Remove Alter from Roster
- Navigate to the specific Roster where you want to remove an alter
- Click: Library » Rosters
- Find the Roster where you want to want to add the new alter you just created and then press the yellow “Edit” button.
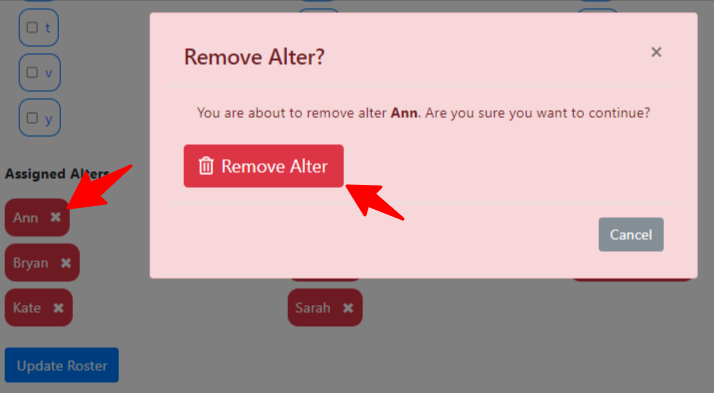
- In the “Assigned Alters” section, click the “x” next to the name of the alter you want to remove.
- You will see popup confirmation menu; click the red “Remove Alter” button to complete the alter removal (see below).
-
If you accidently clicked on the wrong alter, you can press the grey “Cancel” button to retain the alter.
Send Survey via Email to Roster
Before emailing your survey to individuals assigned to a created Roster, you can customize aspects of the email.
- Navigate to Rosters page (Library » Rosters)
- Click “Library” from top menu and then click the blue “Rosters” button)
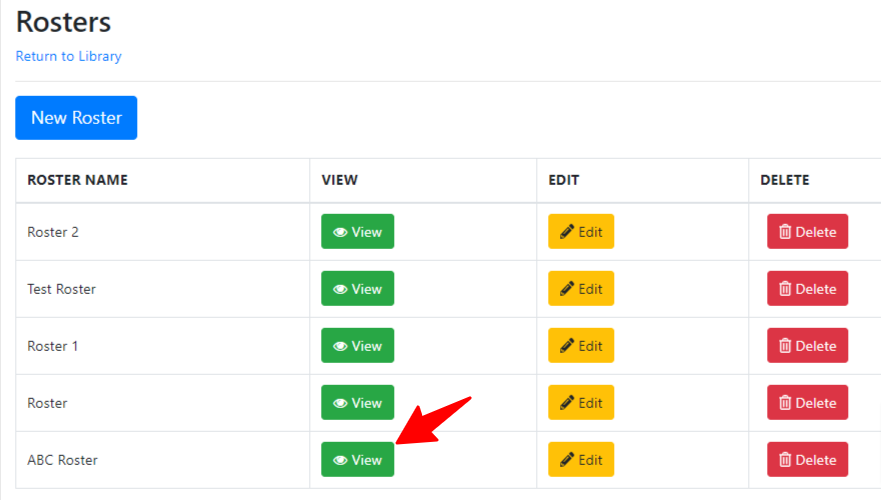
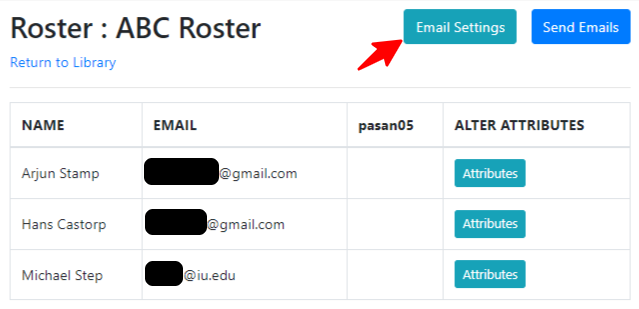
- Click the green “View” button next to the name of the Roster, which contains the list of individuals you want to send the survey
- Note: Make sure you have entered the correct email address for the individuals in the Roster, since the survey cannot be delivered without an email address.
- Click the “Email Settings” button (shown below)
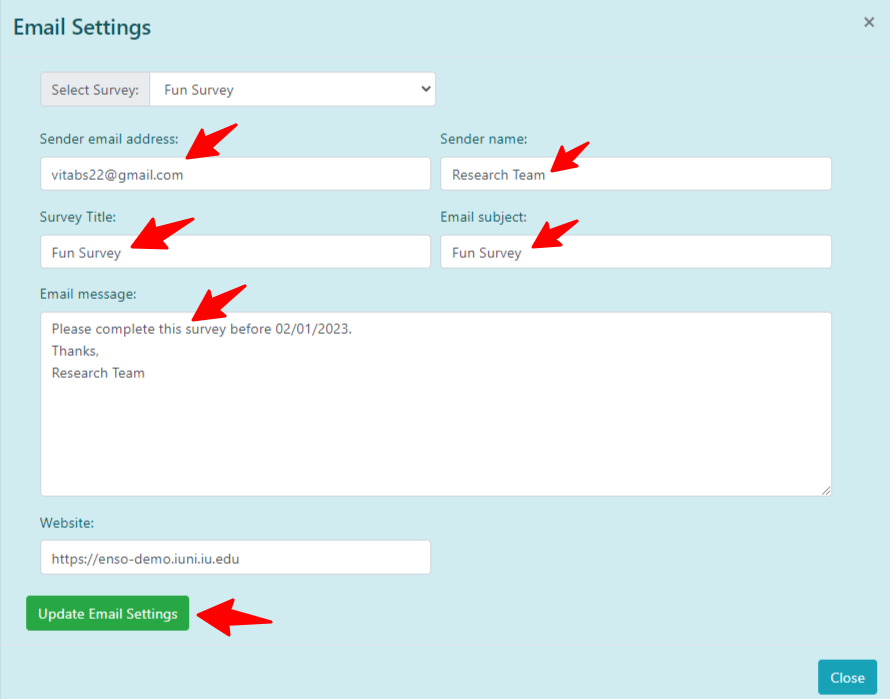
- Edit Email Settings
- Select Survey from the pulldown menu
- Use the appropriate fields to modify how the email will be shown to survey recipients. You can modify fields such as Sender email Sender name, Survey Title, Email subject, and Email message.
-
Click “Update Email Settings” to complete any changes you made.
Send Emails
After making any desired changes to the Email Settings (detailed above), you can email your survey through Enso.
- Navigate to Rosters page (Library » Rosters)
- Click “Library” from top menu and then click the blue “Rosters” button)
- Click the green “View” button next to the name of the Roster, which contains the list of individuals you want to send the survey
- Note: Make sure you have entered the correct email address for the individuals in the Roster, since the survey cannot be delivered without an email address.
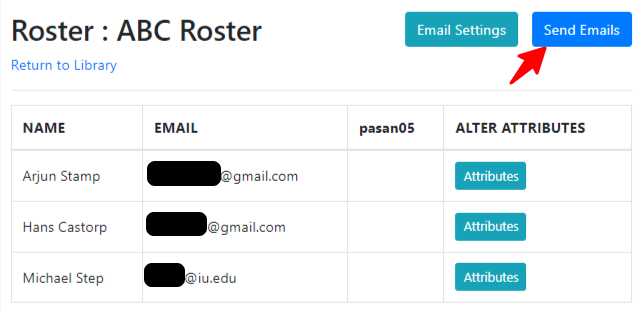
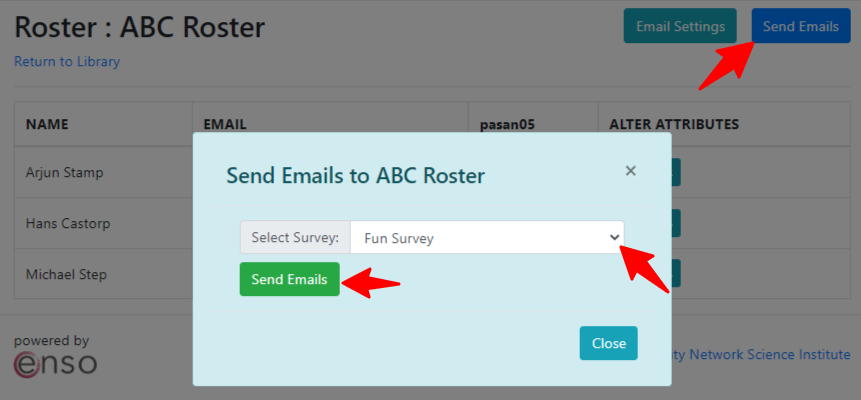
- Click the blue “Send Emails” button (shown below)
- “Select survey” from the pulldown field
- Click the green “Send Emails” button
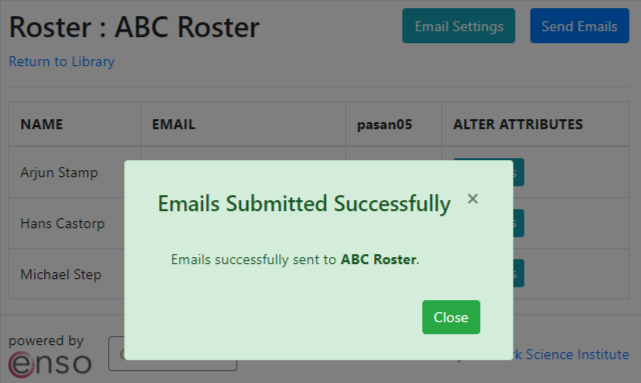
- After clicking, you should see confirmation box stating “Email Submitted Successfully”